
A business email is one of the simplest ways to make your brand look more professional. Instead of using a free email address like [email protected], you can use a domain-based email such as [email protected], [email protected], or [email protected].
This small change makes a big difference. A business email with domain builds trust, improves brand identity, and gives customers a more professional way to contact you. Whether you are running a small business, agency, online store, consulting service, or personal brand, a custom email address helps you look more serious and organized.
If your hosting account comes with cPanel, creating a domain email address is quite easy. cPanel has an Email Accounts section where users can create, manage, and delete email accounts for their domain.
In this guide, we will explain how to create business email in cPanel, how to access it, how to connect it with mobile or desktop apps, and what best practices you should follow after setting it up.
What Is a Business Email with Domain?
A business email with domain is an email address that uses your own website domain name after the @ symbol.
For example:
This is different from a free email address such as Gmail, Yahoo, or Outlook. A domain-based email makes your communication look more official because it directly connects your email identity with your website or business name.
For example, if your website is example.com, then an email like [email protected] looks more trustworthy than [email protected].
Why Your Business Should Use a Domain Email Address
Many small businesses start with free email accounts because they are easy to create. That is fine in the beginning, but as the business grows, a professional email address becomes important.
A domain email address gives your business a clean and trusted appearance. Customers are more likely to respond to an email that comes from a proper business domain. It also helps your team stay organized because you can create separate emails for different departments.
For example:
[email protected]can be used for sales enquiries.[email protected]can be used for customer support.[email protected]can be used for invoices and payments.[email protected]can be used for internal operations.
This makes communication easier to manage and also gives customers the right contact point.
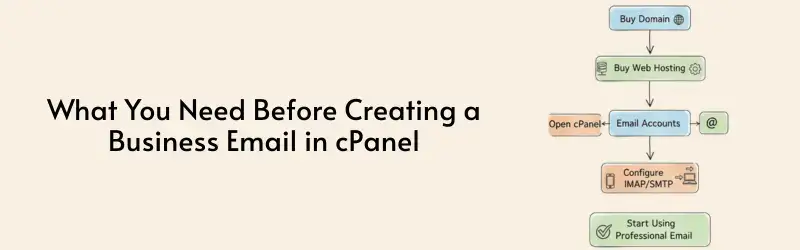
What You Need Before Creating a Business Email in cPanel
Before you create a cPanel email account, keep a few things ready.
First, you need an active domain name. This is the domain that will appear in your email address. For example, if your domain is mybusiness.com, your email can be [email protected].
Second, your domain should be connected to your hosting account. If your website is already hosted on cPanel, this is usually already done.
Third, your hosting plan should include email hosting. Most cPanel hosting plans allow you to create email accounts, but the number of accounts and storage space may depend on the plan.
Fourth, you need access to your cPanel login. Usually, you can access cPanel from your hosting provider’s client area or directly through a URL like https://yourdomain.com:2083. cPanel’s official documentation also mentions port 2083 for cPanel login access.
Step-by-Step Guide to Create Business Email in cPanel
Creating a domain email address in cPanel is beginner-friendly. You do not need coding knowledge or technical server experience.
Step 1: Log in to cPanel
First, log in to your cPanel account.
You can usually access it through your hosting account dashboard. Some hosting providers also give a direct cPanel login link in the welcome email.
You may also try opening:
https://yourdomain.com:2083
Replace yourdomain.com with your actual domain name.
Enter your cPanel username and password, then click Log in.
After logging in, you will see the cPanel dashboard with different sections like Files, Databases, Domains, Email, Security, and Software.
Step 2: Go to Email Accounts
Once you are inside cPanel, scroll down to the Email section.
Click on Email Accounts.
This is the main area where you can create and manage email accounts for your domain. According to cPanel’s official guide, users can create a new email account from cPanel » Home » Email » Email Accounts by clicking Create.
Step 3: Click on Create
Inside the Email Accounts page, click the Create button.
This will open the email account creation screen.
If your hosting account has multiple domains, you will see a domain selection dropdown. Choose the domain for which you want to create the email address.
Step 4: Enter the Email Username
Now enter the username for your email address.
For example:
If you enter info, your email address will become: [email protected]
If you enter support, your email address will become: [email protected]
Choose a username based on the purpose of the email account.
- For general enquiries, you can use
info. - For customer service, use
support. - For sales, use
sales. - For billing, use
billing. - For personal business communication, use your name, such as
[email protected].
Step 5: Set a Strong Password
Next, create a strong password for your email account.
A weak password can put your email account at risk. Since business emails often contain customer conversations, quotations, payment details, and private communication, password security is very important.
Use a password that includes:
- Uppercase letters
- Lowercase letters
- Numbers
- Special characters
- At least 12 characters
Avoid using simple passwords like password123, companyname123, admin123, or yourname@123.
cPanel also provides a password generator option in many installations. You can use it to create a strong password automatically.
Step 6: Set Email Storage Space
After entering the username and password, you may see an option to set storage space for the email account.
This decides how much disk space the email account can use.
For example, you can assign:
- 500 MB for basic email usage
- 1 GB for regular business communication
- 5 GB or more for users who receive many attachments
- Unlimited, if your hosting plan supports it
Step 7: Create the Email Account
After filling in the required details, click Create.
Your new domain email address will now be created.
You can find it listed under the Email Accounts page. From here, you can manage the account, change the password, adjust storage, access webmail, or connect it to an email client.
How to Access Your Business Email
After creating the email account, the next step is accessing it.
There are mainly two ways to use your cPanel email account:
- Access through Webmail
- Connect with an email app like Outlook, Gmail, Apple Mail, or Thunderbird
Both options are useful. Webmail is easier for beginners, while email apps are better for daily professional usage.
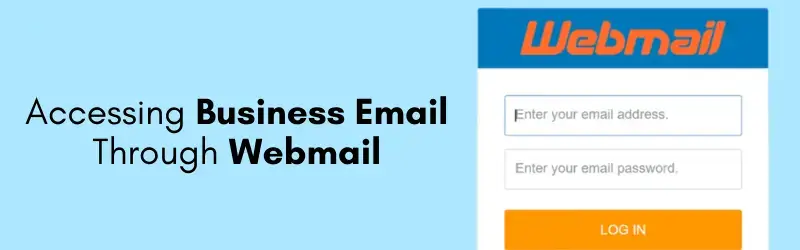
Accessing Business Email Through Webmail
Webmail allows you to check your email from any browser without installing an app. cPanel’s Webmail interface allows users to access email accounts through a browser or mobile device.
To access Webmail, open:
https://yourdomain.com:2096
Replace yourdomain.com with your actual domain.
Now enter your full email address and password.
For example:
- Email:
[email protected] - Password: Your email account password
After logging in, you can read emails, send emails, manage folders, and change basic email settings.
Connecting cPanel Email to Outlook, Gmail, or Mobile
For regular business use, connecting your email to an app is more convenient. You can receive notifications, manage multiple accounts, and reply faster.
Inside cPanel, go to Email Accounts and click Connect Devices next to your email account. cPanel’s documentation mentions that the Connect Devices option provides mail client setup details and automatic configuration options where available.
You will usually see details like:
- IMAP server
- POP3 server
- SMTP server
- Incoming mail port
- Outgoing mail port
- SSL settings
- Username
For most users, IMAP is recommended because it syncs emails across multiple devices. If you read an email on your phone, it will also show as read on your laptop.
POP3 downloads emails to one device and may remove them from the server depending on settings. It is less suitable if you use multiple devices.
SMTP is used for sending emails.
Recommended Email Settings
While exact settings may vary based on your server, common secure email settings look like this:
- Incoming Server:
mail.yourdomain.com - IMAP Port:
993with SSL - POP3 Port:
995with SSL - Outgoing Server:
mail.yourdomain.com - SMTP Port:
465or587with SSL/TLS - Username: Full email address
- Password: Email account password
Best Email Names for a Business Domain
Choosing the right email name matters. A clean email address looks professional and is easy for customers to remember.
Here are some useful examples:
[email protected]— General enquiries[email protected]— Sales communication[email protected]— Customer support[email protected]— Payments and invoices[email protected]— Hiring and employee communication[email protected]— Internal administration[email protected]— Friendly general contact[email protected]— Website contact forms
For individual employees, you can use:
coolbusiness@, boss@, or random numbers unless they are part of your brand identity.Important DNS Records for Business Email
Creating an email account is only one part of the setup. For proper email delivery, your domain’s DNS records should also be correct.
The main email-related DNS records are:
- MX Record: Tells the internet which server handles email for your domain.
- SPF Record: Helps verify which servers are allowed to send emails from your domain.
- DKIM Record: Adds an authentication signature to outgoing emails.
- DMARC Record: Helps protect your domain from email spoofing and phishing.
If these records are not configured properly, your emails may go to spam or fail delivery.
In most cPanel hosting setups, these records are automatically created when your domain is hosted on the same server. However, if your DNS is managed through Cloudflare or another DNS provider, you may need to manually copy the correct records there.
Tips to Keep Your Business Email Secure
A business email account can become a serious risk if it is not secured properly. Hackers often target weak email passwords to send spam, steal data, or damage domain reputation.
Follow these basic safety tips:
- Use strong passwords for every email account.
- Do not reuse the same password across multiple accounts.
- Change passwords when an employee leaves your company.
- Avoid logging in from unknown public computers.
- Do not click suspicious links in emails.
- Keep your devices updated.
- Use spam filters where available.
- Monitor mailbox storage regularly.
- Avoid sending bulk marketing emails from normal business mailboxes.
Common Problems After Creating cPanel Email
Sometimes users create an email account successfully but still face issues. Here are common problems and simple checks.
Email Not Receiving
Check whether your domain has the correct MX record. If your DNS is managed outside the hosting server, update the MX record there.
Also check whether the mailbox storage is full. If storage is full, new emails may bounce.
Email Going to Spam
Check SPF, DKIM, and DMARC records. These records help email providers trust your domain.
Also avoid sending too many emails at once from a new email address.
Cannot Log in to Webmail
Make sure you are using the full email address as the username. Also verify the password from cPanel.
If needed, reset the email password from the Email Accounts section.
Outlook or Gmail Not Connecting
Check whether you are using the correct IMAP, POP3, and SMTP settings.
Use the Connect Devices option inside cPanel to get the exact server details.
Mailbox Storage Full
Increase the email account quota from cPanel or delete unnecessary emails and attachments.

Business Email vs Free Email: Which Is Better?
A free email account is fine for personal use. But for business communication, a domain-based email is much better.
A business email creates trust. It shows that you own a proper domain and have a professional setup. It also helps customers identify your brand easily.
For example, if a customer receives a quotation from [email protected], it looks more official than receiving it from a random free email account.
A business email also gives you better control. You can create and remove accounts for staff, departments, and projects. If someone leaves the company, you can change or disable that email account.
Final Thoughts
Creating a business email with domain in cPanel is a simple but important step for any business. It improves your brand image, builds customer trust, and makes communication more organized.
With cPanel, you can create a professional email address in just a few minutes. You only need to log in to cPanel, open Email Accounts, choose your domain, enter the email username, set a strong password, assign storage, and create the account.
After that, you can access your email through Webmail or connect it to Outlook, Gmail, Apple Mail, or your mobile device.
For best results, also make sure your DNS records, SPF, DKIM, and DMARC settings are properly configured. This helps improve email delivery and reduces the chance of your emails landing in spam.
A professional email address may look like a small thing, but it creates a big impact. It tells customers that your business is real, organized, and ready to communicate professionally.